Showing posts with label DIY. Show all posts

Tuesday, 5 June 2012

DIY Terrarium

Cactus and succulent plants are all the rage at the moment. They are cute and come in a huge variety and are so hardy and easy to care for. They do love a lot of sun but not a lot of water so they are perfect for your kitchen window or on a sunny patio.  A great way to display your little plant beauties is with your very own Terrarium. Terrariums were big in the 70s and they are making a huge come back. I’m going to show you how to make one of your own. It is VERY easy.


What you need:
  • A glass jar or vase (any glass container to your liking will work)
  • Some plants – succulents, cactus, moss, orchids etc.
  • Some small stones or pebbles
  • Some garden soil or succulent potting mix

Building your Terrarium:
  • Put a layer of pebbles or stones on the bottom of your jar (this will help to stop the plant roots from getting too wet)
  • Spoon some soil or potting mix onto of the pebbles. The soil needs to be thick enough to completely cover the plant roots.
  • Position your plants however you feel looks best making sure they are well covered in soil.
  • Add in any little decorations you may like to use (gnomes, mushrooms, pixies etc.)
  • Give your plants a light watering (A water spray bottle is great for watering)
  • Position in a sunny place around the home or on your patio.

Remember:
  • Only water your plants when the soil is completely dry.
  • Keep in the sunlight.
  • Don’t leave the lid on your jar as it will become too humid inside for your plants and their roots will rot.

Here are some cute Terrariums to give you some inspiration.  


Thursday, 24 May 2012

Instagram Craze

Most people now know what Instagram is and a massive amount of people have jumped on board to be a part of the craze that some would say is becoming bigger and better then Facebook. But for those who haven’t been trapped in the world of the iPhone and have no idea what I’m talking about, in short Instagram is a free photo sharing program that allows users to take a photo on there iPhone, apply a digital filter to it, and then share it on a variety of social networking services, including Instagram's own. It is a fun way to share your life with friends through a series of pictures.


So what could make Instagram even more fun and addictive then it already is? The ability to now print your photos to have around your home or to give away as gifts.
Two great sites I have found are: http://printstagr.am/ and http://stickygram.com/

These sites print your Instagram photos in a variety of cool affordable ways including:

Fridge magnets

 Mini prints


 Books

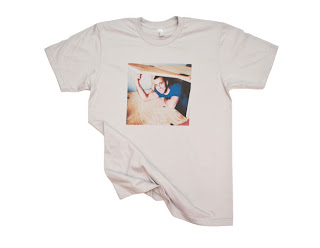
 T-shirts


 Stickers

Posters

 Here are some of my favourite examples of ways you could use Instagram prints.


Tuesday, 24 April 2012

Personalised Word Jars.

Here's another quick and easy idea that will bring a bit of fun into the home. Personalised jars and vases with your own words or message.


This could not be easier. All you need are some jars or vases of choice, some chalk or a sewing pencil, a hot glue gun and some spray paint.

1. Start by writing your words on your cleaned and dry jars with your chalk or sewing pencil.


2. Carefully go over your words with glue using your hot glue gun.


3. Wait for the glue to dry and then spray your vases with your paint colour of choice.


4. Allow to dry and display. So simply and so effective.


Thursday, 19 April 2012

Chocolate Magic

I'm super excited. Why? I found this great little recipe on how to make your very own Ice Magic chocolate topping.


What's even better. It's so easy to make and unlike the stuff you buy in the supermarket this one has no nasty chemicals.

All you need is: 1¼ cups of chocolate chips and ½ cup coconut oil (measured when solid).

Place the Chocolate chips and coconut oil in a microwave bowl and heat for about 1 minute (depending on your microwave may need a little less or more time)

Sit the chocolate mix aside for a few minutes to allow the heat of the oil to melt the chocolate and then stir until smooth. It should be a runny consistence.

Pour into a cleaned recycled sauce bottle or glass bottle of choice. Store in the refrigerator.

To serve, heat bottle or jar in microwave with cap open for about 30 seconds. Slightly shake and continue heating at 15 second intervals until liquid. Pour over ice cream and in a few seconds watch the magic appear.

Goes on liquid and then hardens to create a chocolate shell.

Hmmm, Suddenly I'm rather hungry. I think I'll definitely be making this one over the weekend.

Monday, 16 April 2012

Test Tube Chandelier

Now this I love. It's by designer Pani Jurek and I think it is amazing. I think one of these would look great in a dining room or lounge room and they look super fun.

I don't have the DIY instructions for this one but I do think anyone creative or handy could put one of these together pretty easy. All you need is a collection of chemistry test tubes, some plywood, wire, an electric saw and an electric drill.

You have to agree, its a super cute lighting idea.


Not into florals? No worries. Here's a rainbow food colouring option for you. The choices you could use are really endless.


Friday, 13 April 2012

DIY pretty storage containers

Here's a simple yet cute idea for your stockings and tights from www.onekingslane.com
Next time you get a run in your stockings, don't throw them away turn them into these adorable looking vases and containers.


All you need are your new or old stockings / tights, some double sided tape, some scissors and some glass vases or jars.


> Cut your stockings / tights up the top and bottom of each leg to create two tubes.
> Stick your double sided tape around the rim of your glass.
> Slide your stocking tube carefully over your glass and stick to your tape.
> Trim excess stocking at trim of glass.
> Tuck excess stocking at bottom of the glass underneath glass & secure with extra tape.

So simple yet so effective. With all the different tights and stockings available at the moment your sure to be able to make some great looking vases and containers. I can't wait to make some for myself.

Sunday, 18 March 2012

DIY Bunting Flags

I am 100% totally in love with bunting flags. They are so cute and fun looking and are really easy to make. Why not make a set for your home, garden or next celebration.  

The flags can be made from scrap material, old vintage sheets, doilies or any material you have lying around. The more material you have the longer your flags will be and remember the material doesn’t have to be the same for each piece.


 What you need:

-          Material
-          Pinking shears (Or straight material scissors if you don’t have pinking shears)
-          Piece of cardboard to make your pattern
-          Ruler and pen
-          Fabric chalk / pen
-          Pins
-          Thread
-          Sewing machine. (Can be sewed by hand but the machine is much faster and neater)
-          Double fold, extra wide bias tape in colour of your choice (Length you want flags to be)
-          Spray Starch
-          Iron


Here's How:

Using your ruler and pen draw up a template on your cardboard for your triangle pieces. 5 inch x 7 inch or similar.

Place your template about an inch from the edge of your fabric. Trace template with fabric pen / chalk. Trace around pieces of fabric until you have desired number of triangles.

Use pinking shears or scissors and cut out the flag pieces. Cut on the outside of the chalk line.

Line up your triangle pieces and place pieces into bias tape, making sure that shorter edge of the bias tape is on top. Leave about two inches between flags.

Pin flags to bias tape.

Thread up sewing machine and sew a straight line along your bias tape securing your triangle pieces in place. Make sure you leave enough room at each end to tie your flags up.

There you have it. So easy and simple yet so affective and fun.


Monday, 12 March 2012

DIY Hot Water Bottle Cover

Why not recycle your old daggy jumper into a huggable cosy hot water bottle cover! It's super easy and quick to do. If you don't have an old jumper to use you can pick up some great ones at the 2nd hand stores. Here's how it's done.


You will need:
4 to 6 Cute buttons. (optional)
An old knitted roll - neck jumper.
Hot water bottle.
Needle and thread.
Sheet of newspaper.
Felt tip pen.
Scissors.
Pins.

How To:
Give your jumper a good hot wash and tumble dry to shrink it a bit. (This will help it keep its shape) Put your hot water bottle on top of your piece of newspaper and draw around the entire outline of your hottie to make your template. Turn your jumper inside out and place it on a flat surface with the roll neck at the top. (Make sure it's nice and flat and any bumps are smoothed out.)


Pin your template piece to the inside-out jumper. The top of the hot water bottle template piece (where you fill the hottie up) should be level with the top of the roll neck. Your jumper will be wider in the neck than your hot water bottle is. 

Now its time to start cutting! You need to cut your jumper in a "U" shape using your template as a guide. To cut the "U" shape, first cut around the bottom curve of the hot water bottle to match the shape of its bottom (you will need to add 1cm when you cut to allow for your seams / stitching) Next cut up each side of the template in a straight line all the way to the top of the sweater.

Now its time to start stitching! Your jumper should still be inside-out. You need to sew from the shoulder seam down each side, around the bottom curve and back up to the other shoulder seam.  Basically you are sewing a "U" shape just like you cut out.  You can hand-sew this seam with small sturdy stitches, or you can sew on your machine for a fast result. Trim away any loose ends. Now, turn hot water bottle cover in the right way out.


You can sew on buttons if you choose or if you used a jumper like my top picture with the buttons and opening already in place you can simply snip the old buttons off with care and stitch on your chosen buttons. (if your jumper was an old 2nd hand one with fugly buttons you may choose to replace them)

That's it! Your done. You can add ribbon or ties to the neck of your bottle if you choose like the following pictures or leave as it is.  Time to get cosy!