Monday 25 June 2012

Tassel Garlands

Over the weekend I throw a bridal shower for my super amazing friend. The bride has been busy making and buying lots of beautiful decorations for her big day and really wanted to have tassel garlands on display. Tassel garlands can be quite expensive to buy so as part of the bridal shower we decided to help her out by making some to be hung on the wedding day. Tassel garlands were made popular thanks to Confetti System and their beautiful designs.


Making garlands at the bridal shower.

They are festive, fun and super easy to make. If you want to purchase some ready-made I recommend Confetti System as they really do an amazing job but for those on a budget or prefer to do things the DIY way, here’s how it’s done.

Supplies -

· various colours of tissue paper (including metallic paper if you like)
· scissors
· glue gun or sticky tape
· cord

Open up your first pack of tissue paper and unfold the sheet. Now, fold the single sheet in half width-wise, and then fold it over twice length-wise.

Take you’re scissors and cut strips of fringe to your desired width along the unfolded short edge of your folded tissue paper. (Try to make them quite thin) You could use a ruler to make sure they are all even and straight if you like. Make sure you leave about 2″ of uncut tissue at the folded edge.


Unfold your two length-wise folds and cut the tissue in the centre, creating two folded halves.


Open your remaining half and lay it out. You should have a sheet of tissue with fringe on either side and a solid section down the centre.


Roll the tissue paper up from the solid centre section, being careful to keep the fringe untangled.


After the entire section is rolled, twist the centre tightly. Then curl it in on itself to create a loop, and secure with a small dot of hot glue or sticky tape.


Trim your ends if desired, and string your tassel onto your cord. Repeat the process until you have as many tassels as you like.


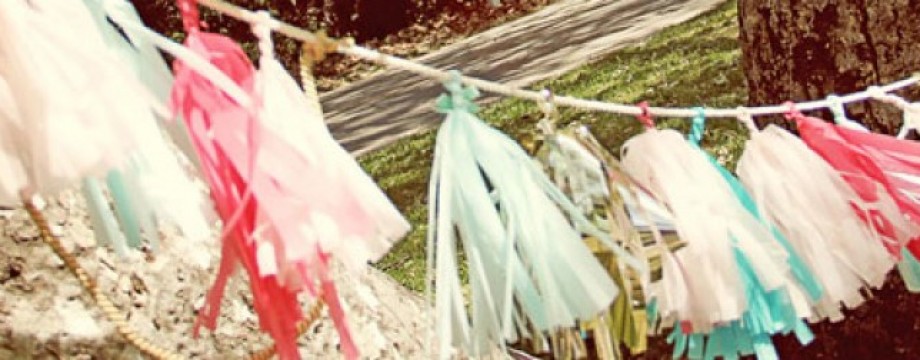
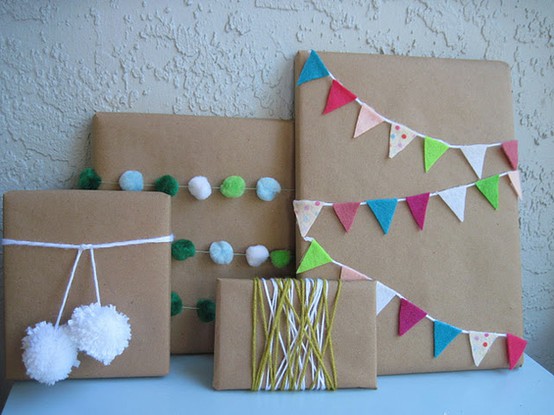
Here are a few examples of how great your garland will look.


Thursday 14 June 2012

Creative wrapping.


I use to work with a lady who always went to extra effort when wrapping gifts. She had a knack of always making any gift that little bit extra special by making the wrapping almost a gift in itself. Shop bought wrapping paper can be expensive and very boring and when you spend time and effort into getting a great gift the gift deserves to be presented in its finest glory, don’t you agree?
I use to remember receiving birthday and Christmas gifts from my work friend and getting inspired to follow her lead in creative gift giving and thinking how lovely she was for spending that little extra time and effort on me to show she really cared – and all of this was before I had even unwrapped the gift to see what was inside.
It really doesn’t take that much effort or time to create something special for your friends and loved ones and when you do I guarantee your gift receiver will love what you’ve created and the thought you’ve put into their special celebration.

Here are a couple of ideas to inspire you into creating your very own creative wrapping.
Sewing patterns & sewing off cuts.

Newspaper and ribbons.

Brown paper and coloured string.

Old maps.

Lollie Pops.

Flowers and greenery.

Buttons and colour.

Hearts and string.

Doilies.

Scrabble letters.

Pom poms, garlands and bunting flags.


Tuesday 5 June 2012

DIY Terrarium

Cactus and succulent plants are all the rage at the moment. They are cute and come in a huge variety and are so hardy and easy to care for. They do love a lot of sun but not a lot of water so they are perfect for your kitchen window or on a sunny patio.  A great way to display your little plant beauties is with your very own Terrarium. Terrariums were big in the 70s and they are making a huge come back. I’m going to show you how to make one of your own. It is VERY easy.


What you need:
  • A glass jar or vase (any glass container to your liking will work)
  • Some plants – succulents, cactus, moss, orchids etc.
  • Some small stones or pebbles
  • Some garden soil or succulent potting mix

Building your Terrarium:
  • Put a layer of pebbles or stones on the bottom of your jar (this will help to stop the plant roots from getting too wet)
  • Spoon some soil or potting mix onto of the pebbles. The soil needs to be thick enough to completely cover the plant roots.
  • Position your plants however you feel looks best making sure they are well covered in soil.
  • Add in any little decorations you may like to use (gnomes, mushrooms, pixies etc.)
  • Give your plants a light watering (A water spray bottle is great for watering)
  • Position in a sunny place around the home or on your patio.

Remember:
  • Only water your plants when the soil is completely dry.
  • Keep in the sunlight.
  • Don’t leave the lid on your jar as it will become too humid inside for your plants and their roots will rot.

Here are some cute Terrariums to give you some inspiration.